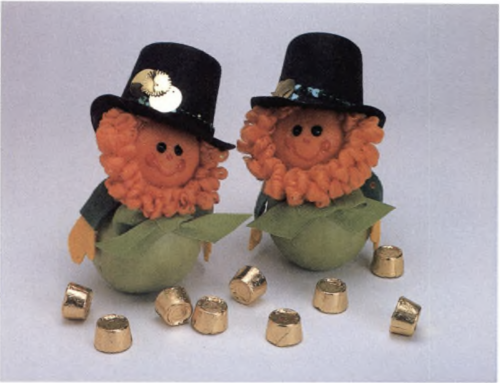


Hang this charming scarecrow on your wall, or add a wooden body and dress him for the porch.
For the Hat:
- 1 large straw hat
- 1/2 of a straw hat, one size smaller than the large hat
- Paint (I recommend using American Acrylic Paints):
- Flesh-color (Flesh)
- Red (Country Red)
- Orange (Pumpkin)
- Black (Ebony Black)
- Blue (Country Blue)
- White (White Wash)
- 1-inch sponge brush
- No. 8 flat brush
- No. 1 liner brush
- 6 yards raffia
- Dried wheat
- 8-inch piece of sturdy cardboard
- 3 yards colorful fall ribbon for a Florist Bow (see below)
- 1 sunflower (dried or silk)
- 3 sunflower leaves (dried or silk)
- Dried wheat sprig
- Clear varnish
- Glue gun
- Wire for hanging
Using the 1-inch sponge brush, paint the crown of the larger hat (excluding the brim) flesh-color. Sketch a very faint black line from one side of the crown to the other, to mark the seamline down the middle of the scarecrow’s face.
With the No. 8 flat brush, paint a red triangle on the center of the crown for the nose. TIP: Always allow time for each color of paint to dry completely before adding the next color. For each eye, paint a heavy coat of white paint, then paint a blue circle and a black pupil. A hand-held blow dryer can really speed things up! Highlight the cheeks with dark pink by mixing red and white paint together and feathering lightly around the edges. Scuff an orange highlight onto the nose and cheeks with the sponge.
Draw black lines around the eyes and nose with a liner brush. Draw a black mouth, and highlight the centers of the eyes with white. Paint black stitches on the nose and on the vertical seamline that extends from the forehead to the mouth.
To make the hair, wrap raffia around an 8-inch piece of heavy cardboard, slide it off and wrap wire tightly around the middle. Cut the ends in several pieces, and fray so that the hair looks scraggly. Glue the small half hat to the top of the head. Glue the hair underneath the brim of the hat, tucking the wire up so it doesn’t show. Fray and fluff the raffia.
Glue wheat, sunflower leaves and wheat sprigs on top of the hat. Make a small raffia bow, and glue it to the bottom of the wheat. Glue the sunflower on top.
Make a bow with a few strands of raffia, and secure it with wire at the chin. Cut some of the loops and fray. Make a Florist Bow and glue it at the chin, covering the top of the wire that attaches the raffia.
Protect the entire project with a spray of clear varnish, and glue a wire to the back to hang.
Florist Bow:
This bow is a festive finishing touch for all kinds of projects.
Materials:
- 3 yards of ribbon
Allow 3 yards of ribbon for a large bow. With your left hand, pinch the ribbon about 8 inches from the end, leaving an 8-inch tail. With the right hand, twist the ribbon at this point over to the “wrong” side, scrunching it tightly together.
Make a 1-inch loop with the “right” side of the ribbon up, twisting it underneath the loop to the wrong side. Pinch it tightly and hold it with your left hand.
To continue making loops for the bow, twist the ribbon over to the wrong side again and make a 3-inch to 4-inch loop. Twist the ribbon over to the wrong side again and make a loop for the other side of the bow, twisting and making loops until you have 7 to 9 loops on each side. The trick is to hold the twists tightly in your left hand while you continue to add loops with your right hand. Leave an 8-inch tail.
Secure the center of the bow by wrapping a 6-inch piece of thin wire around the ribbon you are holding in your left hand, threading it underneath the 1-inch loop and catching all of the center twists of the loops. Twist the wire tightly at the back and use the extra wire to attach the bow to your project.
Adjust the loops to stand out evenly, and hide the wire. Trim the tails on the diagonal or with a “V” wedge. Voila!